Model-driven apps use and, are built over Dynamics 365 CE Platform. So basically, if we are creating an app using the app designer in Dynamics 365, then we are essentially creating Model-driven apps.
Let us see it in detail →
1. Sign to Power Apps: https://web.powerapps.com/
2. Either create a Dynamics 365 Trial https://trials.dynamics.com/ or use an existing Dynamics 365 CE instance or log in PowerApps Admin Center https://admin.powerapps.com/environments and create a new environment.
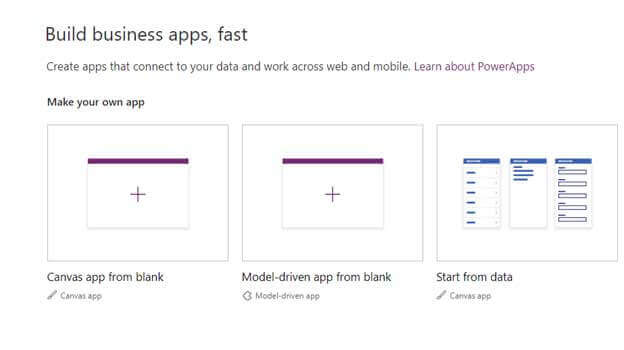
3. Select Model-driven app template
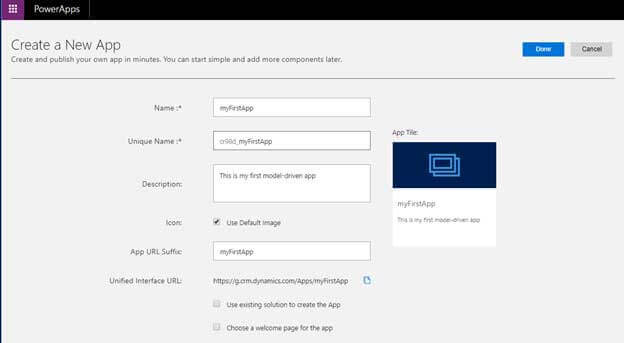
You would be asked to enter Name, Unique Name, Description and other details for the app and click on Done.
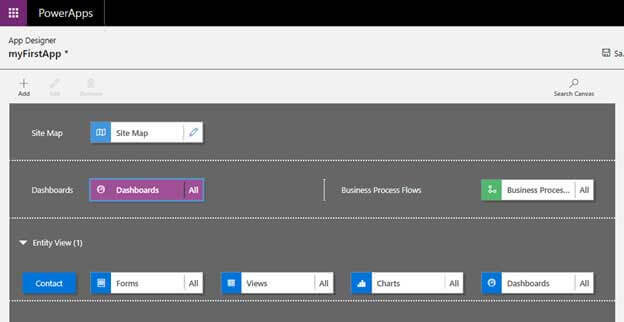
This App Designer will load where we need to add required components. We will start with the first Site Map.
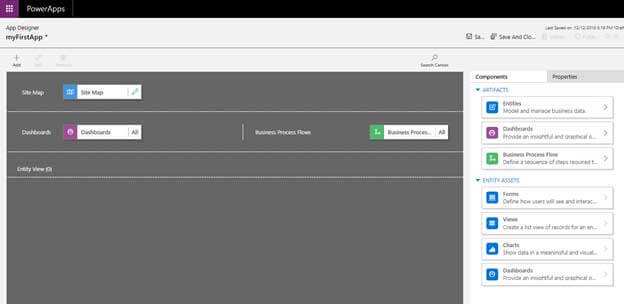
Click on the pencil icon in the Site Map component, which will open the Site Map Designer. The designer allows us to define Area, Group, and Subarea for our model-driven app.

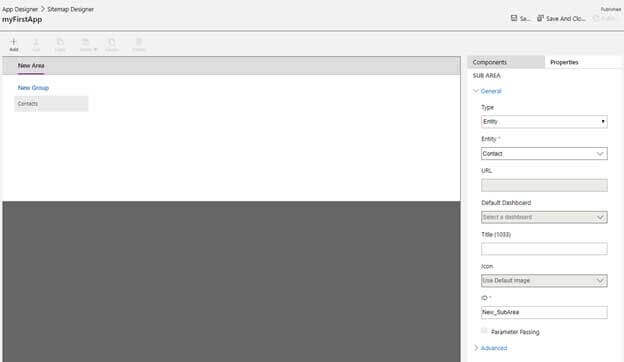
Just for simplicity, we leave New Area, New Group as it is, and add Contact entity in the New Subarea.
For this select New Subarea, and inside properties window specify the following property.
Click on Save and close to save the changes and go back to app designer.
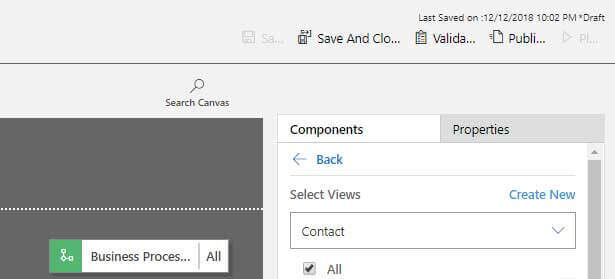
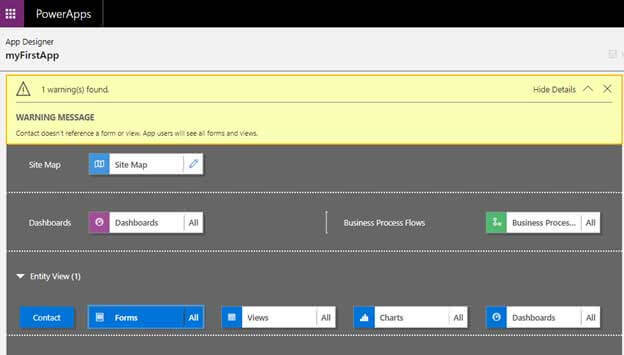
Similar to Sitemap, we can select Dashboards and Business Process Flows component in the App Designer and from their corresponding properties window can choose the Dashboard and Business Process to be included in the custom model-driven app.
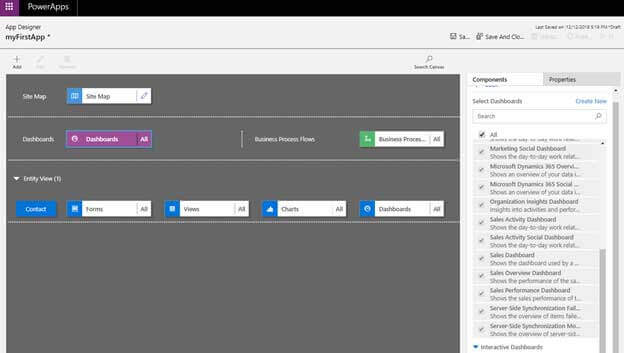
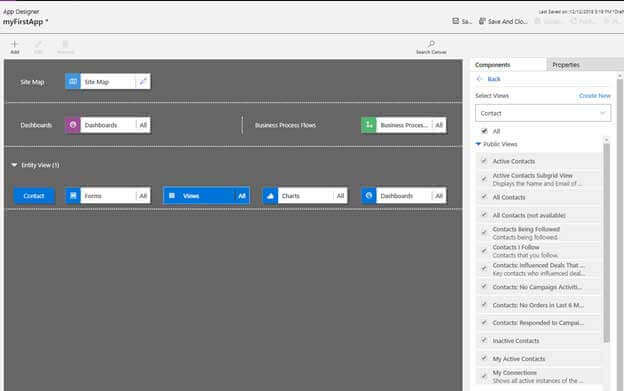
Inside Entity View section, we can see the Contact entity already added and all its corresponding Forms, Views, Charts and Dashboards added.
We can select individual components and can choose which forms, views, charts, etc. we want to include in our model-driven app as shown below.
After done, we can click on the Save button, followed by Validate to check our app for error and if all fine, Publish button to publish our App.
Here clicking on Validate gave us the below warning.
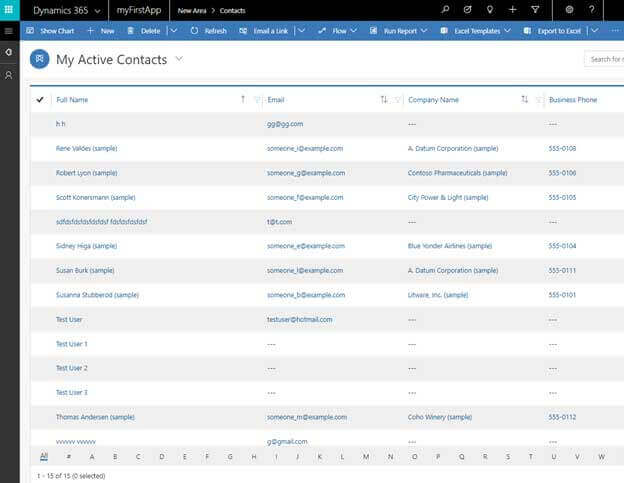
Click on Publish will publish the app so that it is accessible to the users who have rights on it. Play button allows us to run the app.
Clicking on play opens the app as shown below.
Now as we have created our App, the next step is to share it with the user.
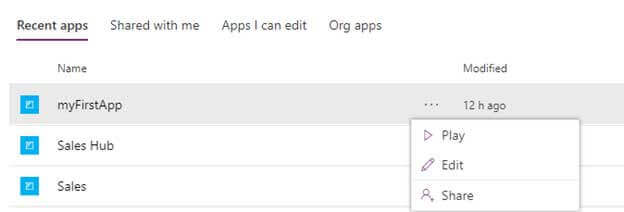
For this go to Apps section, click on ellipsis for the App created, and click on the Share button.
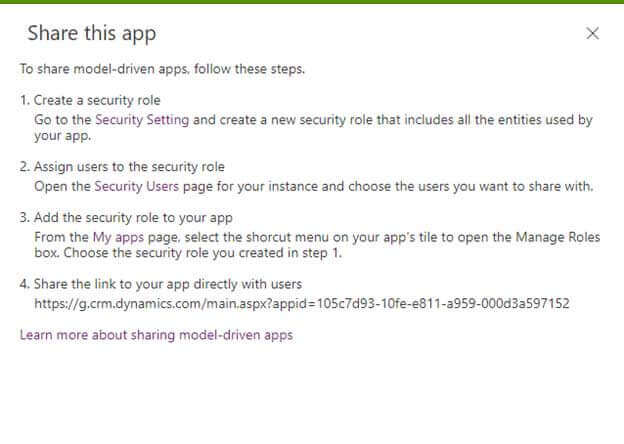
The screen provides all the required information and steps for sharing the app.
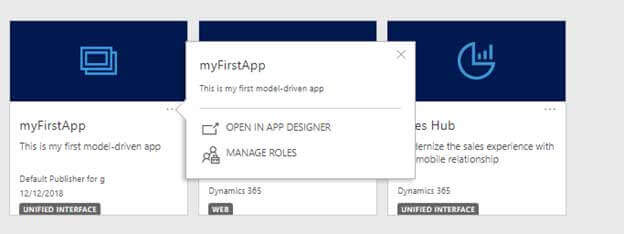
Inside My apps page, we can click on ellipsis for the app and select Manage Roles.
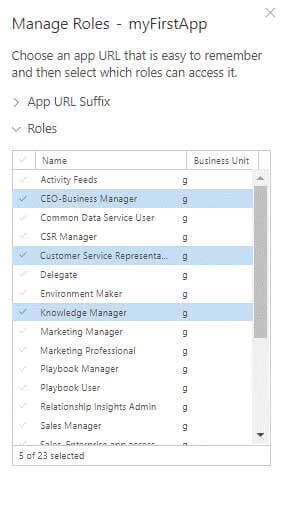
Inside Manage Roles, we can select the security roles to which we want to allow access to the app. The users have those security roles will be able to access the app.
Thus, we have seen how we can easily and without code create a model-based application using PowerApps, a platform of Microsoft Dynamics 365 Apps Services.