In the previous article, we saw how to quickly create Power BI Report, in this article we will learn about embedding or displaying those reports (and dashboard) inside Dynamics 365.
-
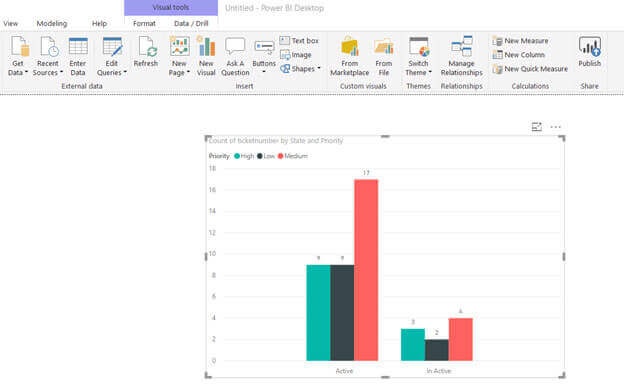
1. Login to Power BI Desktop and open the Power BI Report created and click on Publish.
-
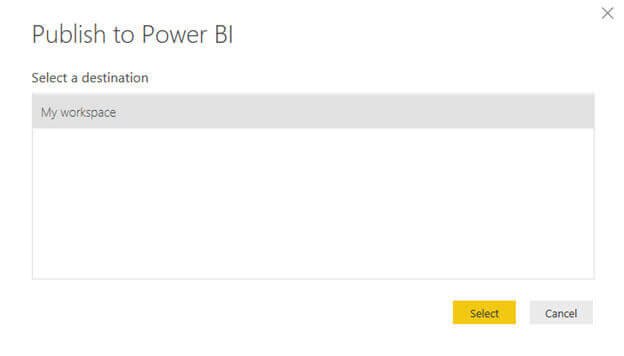
2. Save the report (if not already saved) and publish it to My Workspace as a destination.
-
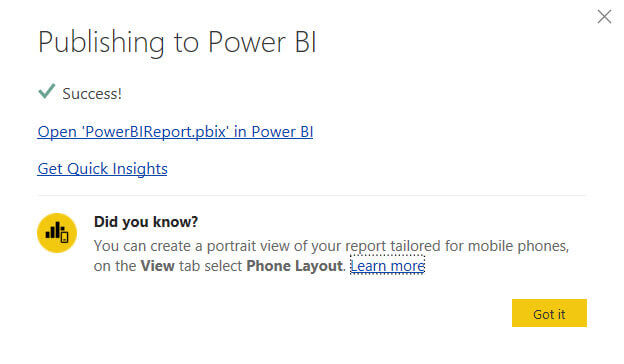
3. After Successful publish, open the Power BI report in Power BI Home
-
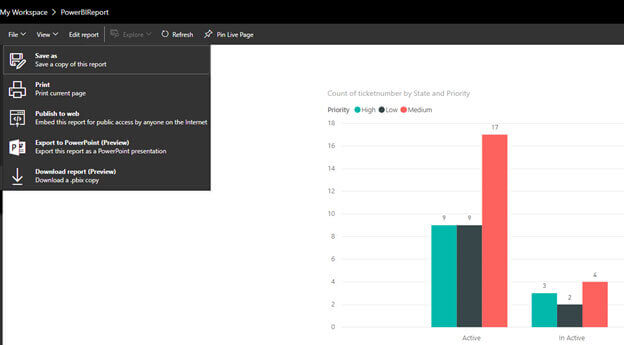
4. Inside Power BI Home, select File → Publish to Web. This will publish the report to the internet and will be accessible to anyone having the URL.
-
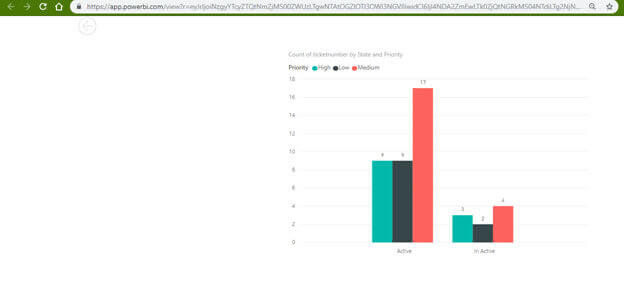
5. Open the URL in the browser and the report will be accessible without the need of any credential.
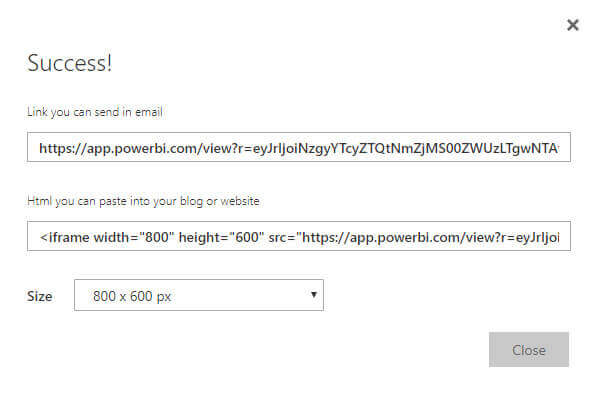
- 6. Using this URL, we can easily embed the Power BI report inside the IFrame component of Dynamics 365 CE Dashboard or as a Web Resource.
- 7. Now let us make use of native integration capabilities of Power BI within Dynamics 365 CE.
-
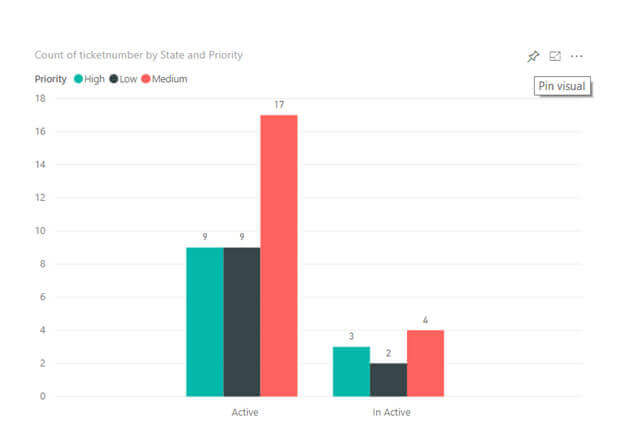
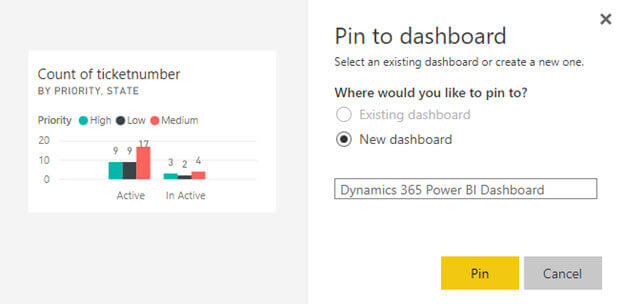
8. For this, we will create a Power BI Dashboard and add our existing report to it. For this inside the Power BI Report, select Pin Visual and select create a New Dashboard Option and click Pin.
-
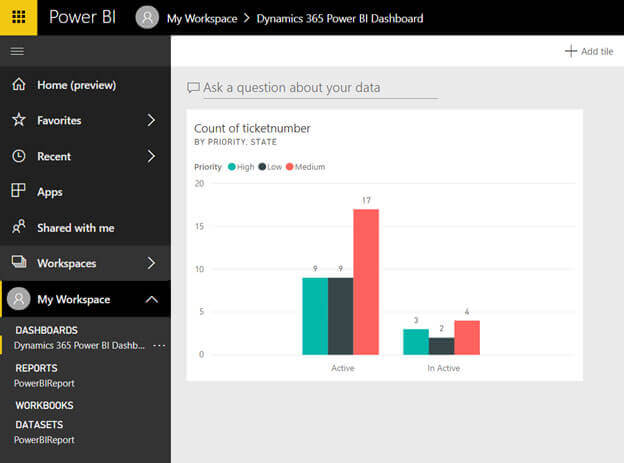
9. This creates a new dashboard and adds the selected report to it.
-
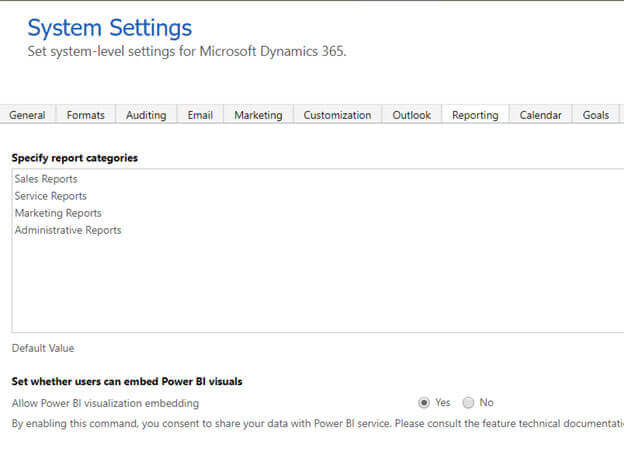
10. Now back in Dynamics 365 CE, let us enable Power BI integration. Go to Settings → Administration → System Settings
Enable the Power BI Visualization Embedding option.
-
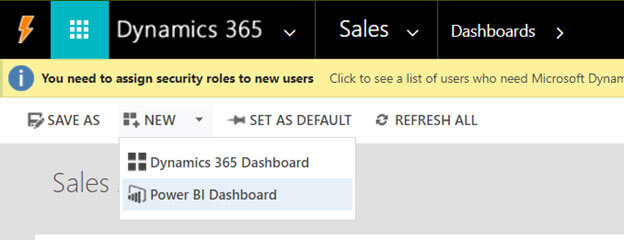
11. Go to Dashboard and click on New → Power BI Dashboard
-
12. Select the Workspace – My workspace and the Dashboard.

-
13. The Power BI Dashboard inside Dynamics 365

-
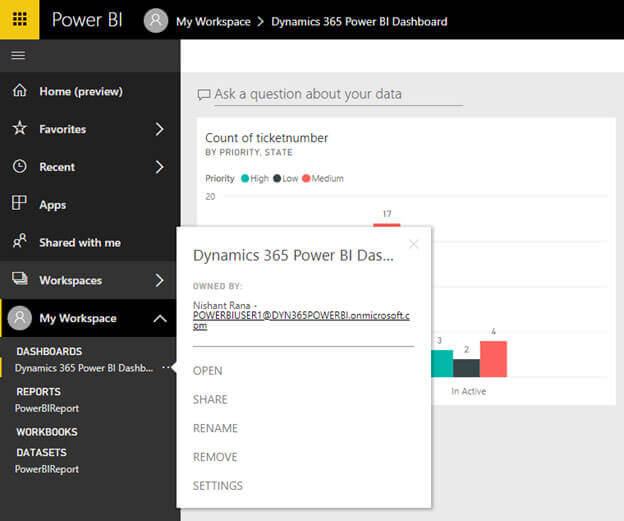
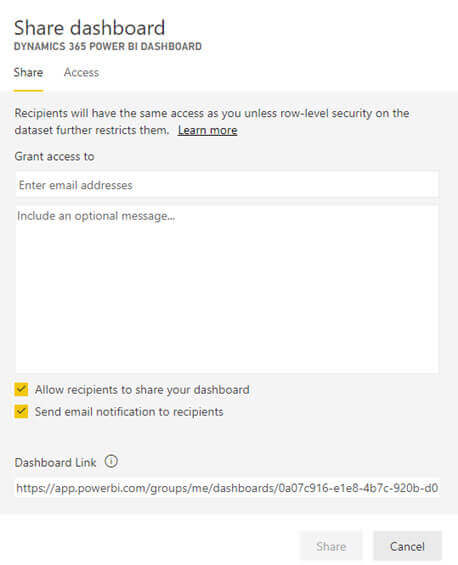
14. Now, what if we want to share the Power BI Dashboard with other users so that they can also create their Personal Power BI Dashboard inside Dynamics 365 tools. Go back to Power BI home, and click on Share.
-
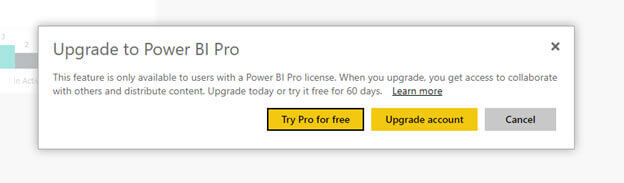
15. We will get the message that Power BI Pro License is required for sharing the report. Click on Try Pro for free to acquire the license. This will be free 60 Day trial.
-
16. Once the trial is activated, we can share the report with another user, who can then create a new Power BI Dashboard inside Dynamics 365 CE using this shared report.
-
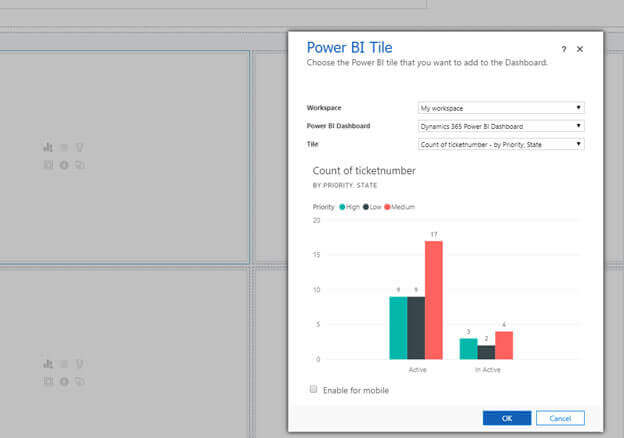
17. Apart from the Dashboard, the Power BI Report can also be embedded inside the normal Dynamics 365 CE Dashboard as a Power BI Tile.
-
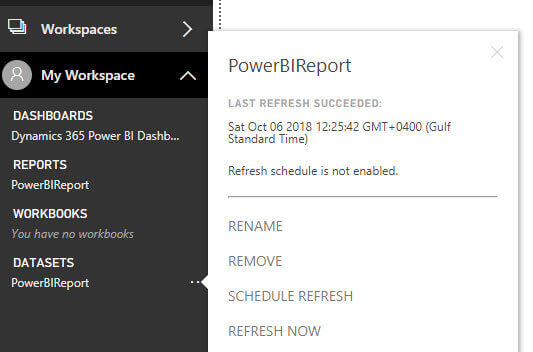
18. One last point that we need to remember is regarding the Refresh of the data, so that end users are looking at the most up-to-date data. It can be done manually by selecting the DataSet for the report and clicking on Refresh Now as shown below.
-
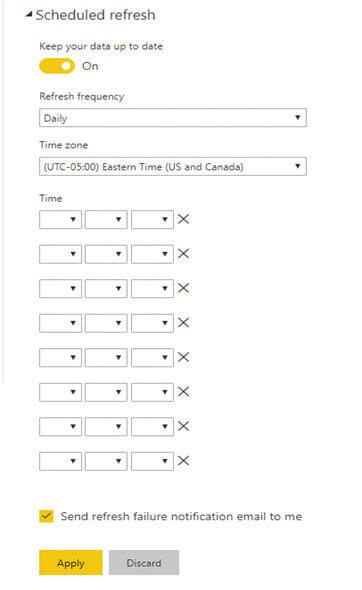
19. The other option is to schedule the refresh by selecting Schedule Refresh option, now as we have enabled the Power BI Pro license we can schedule the refresh to run a maximum of 8 times a day, unlike Power BI Premium. (Which allows 48 times a day)
Thus we saw how easy it is to author a Dynamics 365 CE Power BI Report which is highly interactive and highly customizable in few steps and without writing any single of code and easily embed it within Dynamics 365 CE.